Grain Mite Eliminating and Prevention!
Share
Grain Mite Eliminating and Prevention!
Grain mites seem to be the one thing that has attacked our Dubia roach, and Superworm and Mealworm breeding colonies repeatedly over the years.
This document has been put together using personal experience as well as some in-depth information picked together from various sites and other breeders tribal knowledge.
To be clear here there are no viable Chemical cleaners that can be used to fight these grain mites that aren’t also harmful to animals and humans for that matter.
NOW lets say like most of us, you did not do any prevention, didn’t even know grain mites existed.
Below are some ways to help in your battles!
Click Here to Find out ways of PREVENTING GRAIN MITES! *Check Prevention of Grain Mites in the FB group *
How do you GET RID of Infestations
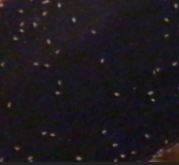
Grain mites running around look like tiny specs
One option, this is extremely laborious but we were stubborn and didn’t want all this work and time to be wasted!
1. Wipe down / rinse any lids or container sides that have mites.
Doing this outside may be the best bet.
2. Get a strainer that the larvae will not climb through or fall through if possible.
3. Pick out as many larvae as you are wanting to save, place them in a container.
4. Rinse the nymphs or larvae in the container you used, with WARM water.
Do this 2 or 3 times then allow the insects to dry a bit in a DIFFERENT and cleaned container.
5. Thoroughly rinse the colony containers, and make sure to wipe all surfaces.
6. For about 2 weeks after make sure to put 2 inches of Vaseline around the inside and outside of the container. Any surviving mites will get stuck and make sure to wipe it off and reapply a few times a week.
7. For these 2 weeks make sure to try and use carrots and potatoes for food / moisture source.
Removing the food after a few hours.
OPTION 2
---Through Reducing Humidity, Wipe downs and/or Quarantine ---
*Found through various groups on the Internet for mealworm farming*
1. Remove lids, if you use them. Remove all moisture for 60 hours, then, put the containers or drawers in a tub of water, about two inches, overnight. [Removing moisture for 72 hours does not harm the larvae.] Hint: Test your tub to make sure water will stand in it at the correct depth all night without leaking out before you do this method!
2. Remove all moisture for 72 hours. After this time, wipe sides of containers with a clean, wet cloth, inside and out, as well as any holding structures. After returning dry containers or drawers to designated, cleaned location and adding small veggie, put one or more 3 to 5 oz. short cups of water [1/2 to 3/4 full] on top of the substrate near the corners. Wash, dry and refill daily. Mites are attracted to these cups, crawl in and drown, and are washed off the sides of the cups, as well as any eggs they lay on the cups. Over time, there will be less mites on these cups and you can go a few days between wash/dry/refill routine, until there are no mites to be found!
3. Apply a 2" line+ of petroleum jelly about 1" above the substrate. The mites get stuck on it and it also keeps them from traveling. [Olive or vegetable oil works just as well as petroleum jelly and is easier to wash off later!] This technique is also good as a preventative measure.
4. Put dog food lightly coated in coconut or olive oil on top of substrate, especially in corners. Mites stick to the oil. Though the protein in dog food is good for growing mealworms, too much oil in the substrate will cause some loss of larvae. Read ingredients label to make sure dog food does not contain DE, diatoms or silica.
5. Sift large larvae and put them in dry (baked and cooled) dog food* and minimal substrate for a period of two weeks with only enough moisture to be consumed in two days. Do this after you have done #1 on this list. Relocate the larvae to a mite free area. *Make sure dog food does not contain DE, diatoms or silica.
6. I haven't done this, but, I read beetles and large larvae can be rinsed briefly with water without harm, dried, and returned to clean containers and bedding; clean set-up and relocate to another area. [See quote below.]*
7. Change moisture/veggie daily. Dispose of mite-covered veggie in a plastic bag. A lettuce leaf is a good choice for this method. If you use carrots, potato, or other dense veggie, you may rinse and dry the veggie well and return it to the mealworm container.
8. Start a new mealworm farm beginning with clean pupae, which are kept in a clean container with no substrate. As the pupae morph, put these beetles in a clean drawer or container with sterilized substrate. [Important: Maintain bio-security from mite infested farm and control measures until the entire mite-infested farm ages out.] Any covering, such as a damp paper towel, should be changed daily.
We hope that this helps you in your fight.
Please join us for more tips and discussions in our FB community page!
https://www.facebook.com/groups/dubiaplus/
